Thursday, January 19, 2017

Into the Wild Blue Yonder - Episodes 1 & 2

Following on from my previous article elaborating about my thoughts on a Season 3 Fishermen tournament roster, we have tragic tales of my failures:

Game 1 - Alchemists

Shark, Salt, A+G, Siren1, Greyscales, Kraken
vs
Midas, Naja, Vitriol, Venin, Katalyst1, Harry


Wish I could make a sweet '6v6' graphic like this for these matchups

This game was a bit of a non-game on account of being a perfect storm on my side. A brief summary of the match:

  • I lost the roll and my opponent elected to receive. Shark was the easy choice for kick off here - there was a patch of rough ground on the right and the kick landed perfectly.
  • Vitriol had to run to retrieve and kick back to Midas.
  • Using his advanced move from the kick off, Shark charged Midas, got the ball, a dodge and a Gut & String, then scored and dodged back into Vitriol's waiting arms.
  • Ball goes back to the Alchemists and ends up on Venin.
  • Venin gets dragged up by Siren & Kraken, ball is taken and given to Greyscales
4 - 0 Fish

Turn 2:
  • Greyscales gets some momentum and dodges into Tap In range to knock in another goal. Ball flies back to Katalyst1.
  • Katalyst goes balls deep into Kraken/Siren/A+G, dropping the ball to Venin? on the way in. Knocks Kraken around a bit and sets shit on fire.
  • Avarisse + Greede start their activation B2B with 2 INF on the big guy. Greede  reattaches to clear conditions. Avarisse clears fire, walks up to momentously push/Tackle Venin. Greede dettaches, walks around Harry and uses the second INF to kick 6" to Greyscales, who uses the momentum from the pass to snap shot a goal within Tap In range.
12 - 0 Fish

Didn't get to really test the roster much in this game. Greyscales and A+G were definite MVPs.
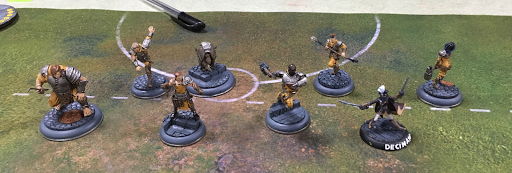

Game 2 vs Masons


This one on the other hand was a real grinder, with my opponent almost bleeding 1VP to clock (this doesn't happen during influence allocation), whereas I was sub 2 minutes by the end.

Corsair Salt Jac Kraken Siren2 Greyscales
vsHammer Marbles Tower Brick Flint Mallet  
  (sitting out: Honour, Chisel, Mist)

I won the roll and chose to receive, likely the right choice given that Flint is both a great turn 1 goal scorer and Close Control stops Shark's first activation goal trick.

The draft went like this:
  • Salt / Marbles
  • Corsair / Mallet
  • Siren2 / Tower
  • Greyscales / Brick
  • Kraken / Flint
  • Jac / Hammer
Needless to say, this went pretty shit and I got outdrafted (well, as much as you can get outdrafted in this simple draft system). I gave away the fact that was I wasn't playing Shark way too early, and also committed to one of the Sirens too early. Both give away a lot of my game plan and remove my options.

A better order would like have been Salt -> Jac -> Greyscales -> Kraken -> Corsair -> Siren2

I didn't think about this too well at the time, but there are 3 main issues for my roster in this Masons line up:
  • Tooled Up + Iron Fist makes Hammer able to chew through one of my big guys in one activation.
  • Tough Hide on Hammer & Brick makes them really tough to kill with my lineup (Siren2 and Corsair being the main damage dealers.
  • Hammer's Stoic makes him resilient to all my Pushes.
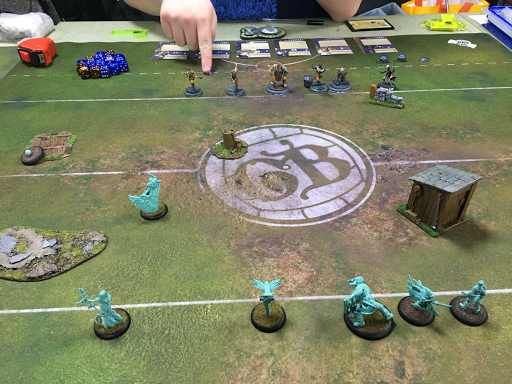
Turn 1:

Hammer kicks the ball to my left, just outside of a forest.  My plan here is to go for a Turn 1 Salt goal, so he gets 3 INF.

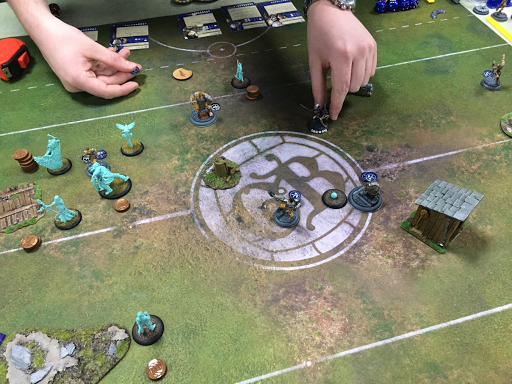
Siren gets 1 INF to retrieve the ball *mistake 1*, and it gradually gets passed up the line. 

Brick runs up next to Hammer, like a warm safety blanket. Hammer is virtually immune to first turn Drag, which is quite annoying. So instead I use Corsair to run up and bait a Counter Charge from Brick (didn't take it, wisely). I Drag Brick over and KD him. 

Kraken then charges Brick and wraps, getting Release The... + 2" Push to send him flying to the other side of the forest, where he stays most of the game, doing nothing. In the meantime, Hammer is getting swole as f*ck and proceeds to beat Kraken to almost death. It was at this point that I realized the following:


Fortunately I managed to land a goal with Salt without too much difficulty, since most of the Masons were busy 'miring at Hammer. The goal kick flies back towards the forest just behind Brick, and Flint jogs over and picks it up.

4 - 0 Fishermen.

Turn 2:

Masons unsurprisingly won the roll to go first, Mallet and Hammer get a full stack, with Flint getting the lion's share of the rest. Mallet proceeds to finish off Kraken first activation. 3" melee pretty good vs those monster counter attacks, it turns out.

My first activation is to Goad Hammer with Jac, and then walk away from him, with Greyscales in the direct path. Jac then spends his remaining INF to hit Marbles, hoping to get a momentous push, but only gets 1 hit (TAC 5 vs 4+/1 - math fail) so has to damage for 1. Numbnuts. *mistake 2*

But yeah, Goad is a pretty good play. If there was a mascot with Goad, that mascot would certainly be pretty decent at worst.

Fortunately for me, Hammer is now sitting in the middle of nowhere and his only option is to advance directly into Greyscales, who can just dodge away. I realize that his only chance to get out of this is to get the ball to Hammer for a Pass 'n' Move teamwork action. 

I don't remember what the next Mason activation was, but there was probably a good reason why it wasn't Flint just passing the ball to Hammer. Nevertheless, I use Corsair to glide up just into the forest and Drag Flint within 2". I am reminded that Flint has Close Control, so instead opt to KD him *mistake 3*. Damn you Jedi mind tricks! 
The ball flies back directly behind Flint, who gets up, use Where'd They Go to get out of dodge and kick the ball to Hammer, who proceeds to dodge over to Corsair and take him out to the box.

Greyscales takes the opportunity to charge Hammer, triggers a Ball's Gone! to pass to Siren. Siren then runs way up the field and throws a pass towards Salt, which scatters right on top of him, and the little otter that could slots another one in the goal and Knee Sliders way back to the forest on the other side. He gets a Vengeance token from 'Who Are Ya?' for his troubles. The goal kick flies into the waiting arms of a large bald Mason captain.

8 - 4 Fishermen

Turn 3:

My memory gets a little hazy at this point so some details from here on get obscured. I think I went second again.

Hammer & Mallet get their usual stack. Kraken and Corsair both shuffle onto the board with 1 INF each, which they later use to run in front of the goal and stare down Brick.

Mallet opens the turn by beating the living crap out of Greyscales, bringing him to 5? boxes. Greyscales responds by tackling the ball from Hammer and beelining for the goal, hunkering next to cover and ready to score next turn *mistake 4*

Hammer responds by Iron Fisting Siren into the dirt, pushing her all the way over to Jac on the way and triggering her 1HP heal and 4" dodge. Siren then charges into Marbles (still in combat with Jac) to get some momentum *mistake 5*, before being taken out by Flint.

Jac responds by walking around Hammer, taking a parting blow from Marbles and using Ramming Speed to get rid of Hammer's Stoic, before hitting him a few times and using his heroic to push him within 5" of the board edge, and Marbles into a patch of rough ground.


8-6 Fishermen

Turn 4:

I go second again. Siren comes back on the side of the board near Brick. Hammer and Mallet get their full stack.

First activation is Mallet bringing Greyscales to one, Singling him Out, Smashing his Shins and tackling the ball. Savage. This was necessary or else Greyscales would probably have taken the ball back off Mallet and scored. 

Jac is my first activation of the turn - he charges into Hammer with Ramming Speed to take off Stoic, then proceeds to massively fluff the charge dice, getting only 1 hit through, which is effectively nothing. I try again with a second attack, bonus timing the roll to get that crucial momentous push, and again fail to get more than 1 hit. 
What a failure. A single push + heroic would have taken Hammer and his 5 INF off the board.

Jac, what a champion

Flint then finishes off Greyscales - what a deadly takeout machine. Hammer proceeds to KD Jac and beat him to about 1/3 of his health. Meanwhile, on the other end of the board, Corsair, Siren and Kraken proceeds to beat Brick down to about 1/3rd health and farm up heaps of momentum, allowing me to go first next turn.

8 - 8 tie

Turn 5:


At this point I am in deep shit, as Masons have the ball, Flint is easily within scoring range, outside any of my threat ranges and there is nothing in the way to stop him. I considered going second for the momentum to get Jac up, but by then I think Mallet would have killed him and dropped the ball to Flint. 

I decide take a risk in charging Mallet with Kraken, hoping for a Release the... to slam him back towards his goal and scatter the ball from there, hopefully well away from Flint for the turn. If this works, then I can probably get a take-out on Brick and win on clock 12 - 10 after Jac goes down to Hammer.

I activate Kraken, KD Brick, and charge Mallet, bonus timing the roll and getting a glorious 2 hits. not even enough for a Tackle. GG. I opt to KD Mallet and hope for a good scatter, which of course lands right next to Jac/Hammer/Marbles.

Flint happily picks up the loose ball and fades into the sunset.

12 - 8 Masons.


Postmortem

What a grinder of a game.

As any good competitor knows, you learn more from hard fought losses than you do from wins. I thus present:

A Map of All My Failures


*Mistake 1* - A better play would have been to  give Siren 1 more INF, put up Dread Gaze for 2 and just drop the ball to Corsair, which would have saved Kraken's life. 
*Mistake 2* - Yeah, don't attack Loved Creature models with playbooks like that.
*Mistake 3* - I essentially forgot that Corsair himself had Close Control. It would have been a much better play to just Tackle Flint twice and hold the ball with the big man, since Flint wouldn't have been able to get it back and safely pass it back to Hammer in that activation. My initial plan was to Tackle the ball and then use the second INF to kick it back out for Salt to pick up, but Close Control killed that.
*Mistake 4* - Instead of using Where'd They Go to get closer to the goal, the right play here would have been to use Greyscales' last INF to dump the ball as close the enemy goal as I could, since Salt most likely you have been able to get to it and Masons would have to commit a lot to stop him.
*Mistake 5* - I think I straight up forgot about Siren's aura here from the playbook result, and then didn't heal with the momentum. Certainly would have saved her from Flint's melee onslaught. Pro. Dave would be proud.


Overall I need to use Siren2 much more effectively, practice Corsair a bit more, and roll better with Jac. Next game I might put in Sakana instead of Siren2 and see how that works out. Alternatively I have to git gud with angry Siren.


Into the Wild Blue Yonder - Preamble

With the first Guild Ball tournament of 2017 coming up late February - SteamApe Con 2017 (second tournament ever in the country, if you ignore Ides of March 2016 as the true first), I've decided to write a little about my journey for this tournament. Partially to get thinking about it, and partially to give away all my strats so I have an excuse when I lose first round.

After some consideration, I've settled on taking my first love, the Fishermen Guild.

My other options were Butchers and Union (thanks to that sweet 40% off resin Steamcon web sale). The Union is still mostly unpainted, and I am missing a couple of models which would probably make my 9 man roster (Minx, Decimate). With being plenty busy with other things in life, I didn't really want to commit to rush painting 4-5 models to go into a tournament with only a few practice games.
As far as Butchers go, I think they are pretty strong in Season 3 and have arguably the best 2 captain combo in the game as far as the 9 man tournament rosters go. Alas after losing a quick test game with a suboptimal lineup to "S.A.G.B." Dave, I mentally retreated to the safety of pesco vegetarianism.


The boys and girls in blue

The Roster


My first run at a roster is the following:


Corsair
Shark
Salt
A+G
Siren
vet Siren
Kraken
Greyscales
Jac

Bench: Angel, Sakana


Let's break this down a bit, as I used to do with WM lists:

Shark is by a sizable margin my preferred captain. He's the reason I started the game with Fish, and the player I have used the most in all my games. He does have some significant weaknesses in the grind/damage dealing department, which is where Corsair comes in. I am not as good with Corsair as I am with Shark, but I feel having access to both as a mid to late roster selection process can be clutch.

Salt is my only mascot because he went from zero to hero in Season 3. Not so much because of the +1/0" to his KICK stat, but because the whole game rotated around him:
  • Slightly greater emphasis on goal scoring
  • Mascots only worth 1VP
  • Mascots have Icy Sponges
  • Tap In
He is one of the better strikers in Fish due to Tap In, and scoring with him gives up almost nothing. He is also reasonably difficult to take out in a game situation because he is usually off by himself away from the action with DEF 5+, meaning he doesn't die in one activation to any random scrub and usually doesn't get crowded out.
A turn 1 goal with Salt is not only quite reliable (88.89% chance with no modifiers, better than a 3 dice striker at distance), but at worst you only trade 1VP for it. Even if he is taken out, you can bring him right back on where you want him due to his high speed. What a mascot.


Avarisse & Greede are almost an auto-include Union choice because they are close to (if not actually) overpowered. Being able to Attach & Detach Greede in the same activation pushes them over the edge a bit IMO.
That aside, these guys are just money in almost any lineup. Avarisse has Tough Hide and a fantastic brawler playbook, which slots in great with the Corsair Attritiermen grind list. Greede's stat buffs in Season 3 (specifically baseline TAC 7 and 4/6" KICK) make him a better all-rounder utility model when you throw in Where'd They Go and access to momentous damage on his playbook. 
Combined they may be the single best selection in the game, with a ridiculous goal threat potential, good support, good resilience, flexibility, and sweet models!

Next we have the core Fish players: Siren(s), Kraken, Jac and Greyscales.

Greyscales is a model that I was actually not too crazy about in Season 2. He was good but often one of the first I'd drop in place of something else. In Season 3 he received three direct changes:
  1. Ball's Gone! now involves a free pass
  2. Lost 2 health
  3. Decoy now works against Character Plays
None of these changes make or break my decision to include him, although the two character play changes are good. He's a bit better of ball retriever with the new Ball's Gone!, since you can charge into a scrum, kick the ball out to someone or empty space, then use Where'd They Go to get out to a semi safe spot.
The biggest thing is Tap In, which gives makes Greyscales a legit goal scorer, making up for his shorter KICK distance with slippery dodges and speed. He fits in well with both Shark and Corsair, and Unpredictable Movement makes him a good pick or counter pick in roster drafting.

Kraken is a model I've always really liked and mostly got better in Season 3 thanks to the double push on his playbook. The change from 2+/1 to 3+/0  (Steamforged's justification - "He's not wearing any armour!" - unlike Brisket) is an overall slight improvement in most situations too, but the +1/0"
KICK is solid.
Kraken is more or less the anchor to the team - he buffs Siren (which I will almost always have in my lineup), he can tarpit like a boss, he has Tough Hide, he can Drag people, he is one of the best counter-attackers in the game. In a Corsair team, they are like those two enforcer guys from the Mighty Ducks movies that go around and beat the shit out of someone on the other team and high five each other.


Next we have Siren, both original and veteran versions. I was quite happy to see Steamforged reverse their stance that you can only take one version of a player in the roster. Sure, you can only have one version in the team, but it opens up a lot more interesting drafting options.
Siren is a great example of that because both her versions are probably the strongest two players in the Fishermen stable. Both are very fast, decent at football, difficult to kill if played correctly, and screw with your opponents.
Siren1 is a bit more focused on ball retrieval and repositioning the enemy via Lure, whereas Siren2 is a bit more focused on getting in the scrap - with a short playbook and momentous damage she could be considered the best damage dealer on the team, and her Dread Gaze aura ups the survivability of the team considerably. Straight up remove 2 dice from the equation!

Jac is last in line and the most likely to be subbed out at this stage. His primary strength is that he is another tough cookie that with 2" melee that can get in a scrap and pass the ball if needed. His main asset is the ability to break up scrums via a multitude of pushes, which is pretty useful against a team that wants to get multiple crowd outs and have short range buffs like Masons or Brewers. Tackle on 1 hit with 2" melee is also pretty legit ball retrieval. One of his biggest downsides is the lack of a reliable momentous result on 1 hit, unlike most Fish.

IMO his best trait at the moment is the ability to move Salt around even more, because that's exactly what Salt needs. More dodging.

The Bench


The two models sitting on the bench at present are Sakana and Angel.

Both strikers as you can see - if anything this probably reflects my tendency to push the game to be played out slightly more on my opponent's side of the field, sometimes going to the lengths of just dumping the ball in their corner and chasing it. A classic ice hockey tactic to boot.
What this means is that the extra striking distance is usually not that important, especially when combined with Tap In being a thing that the quick & slippery Fish benefit from immensely.


Sakana is probably the most well-rounded Fish player, in that he is reliable and resilient. Scores goals when you need him to, supports the team offensively and defensively if you need him to, has a cool goatee.
I think if I went all in with Corsair, Angel would be in my roster for sure, given that she excels with his legendary, is very survivable with Sturdy, and is overall an excellent snap shotting turret. Furthermore, she's probably a very solid opener in any roster draft because she doesn't really give away anything about your game plan other than "score goals".


If I were to make a change to the roster, it'd probably to put in Sakana for either Siren2 or Jac. One of the weaknesses of the roster is it only realistically has 7 players, since both Sirens are mutually exclusive and both captains are mutually exclusive. We shall see!


Next up in this exciting series, we will have summaries/mini batreps/reflections/rage from my test games.


Tuesday, January 10, 2017

S3 Batrep 7 - Moist Morticians


Much excite in the Dojo last night. Chris and I are committing to branching out into new guilds - he with Engineers and myself with Alchemists - so in a show of good will he brought along paper doll Cogs for be to thrash before he gets a handle on all their sweet rules. Involving new guilds in the rotation really blows the game wide open. I don't even have a decent understanding of Morticians yet, let alone the complications introduced by facing guilds with totally different play styles, abilities and options.

Last night also saw the welcome return of Asian Nick, back from his holiday in Japan and ready to deluge us with wild tales of 200+ MtG players at Hareyuya, buying cards for his Modern deck that have just been banned, and not buying cards for his Modern deck on the assumption that an imminent re-release will lower their market value (only to find that it has in fact doubled their market value). Hopefully next week he won't be so hard on the Aether Revolt hype train that he can't bring his Union or Brewers so that I can sit in the peanut gallery for a change and maybe report on a non-Morticians game just to break things up.


So... Engineers. I feel like I'm 2-3 reports away from the obligatory "fuck those guys" comment so we might as well get it out of the way now.

Fuck those guys.


Seriously though, holy shit they're amazing. Chris took the following 9-man roster (eventual team in bold): Pin Vice, Ballista, Mainspring, Mother, Salvo, Ratchet, Hoist (aka 'Moist'... ew), Colossus, and Velocity.

I went off the deep end more than usual with player selection this time taking: Scalpel, Vileswarm, Casket, Ghast, Graves2, and Minx. It was pretty terrible. 11 influence hurt me every turn, Vileswarm was dire, Graves2 constantly demanded being Graves1 instead, the two big guys generating 1 influence were often more irritating than they were worth, and Minx... Minx was almost consistently fantastic.


Chris won the roll off and elected to receive. Scalpel jogged up nearly half the pitch and punted the ball beautifully just over halfway and in the centre of the Engineers line.


******


1. In a mere one game previous we had discovered...


... so it should come as no surprise to anyone that Chris set up his influence to retrieve the ball with Mother by doing exactly that :)

This turned his opening moves into a bit of a shambles affair (he would later claim this is where he lost the game) and in the end Colossus sprinted up to snap the ball with his tremendously sexy Long Legs, moving back to the deployment line and successfully kicking to Velocity who was on the flank opposite Scalpel. Velocity took the opportunity to Dodge away from Scalpel and towards the centre of the table.

But not far enough! Scalpel sprinted up and I popped Voodoo Strings once again the Turn One (and once again I would later regret the decision!). The temptation to retrieve the ball before Chris had generated momentum was just too valuable. At this point I started having a serious read of the Engineers cards and this is really the point where I felt the game started to go downhill for me. Close Control negated my first tackle result and second swing after my initial attack gained me all of a momentous Dodge. I tackled successfully on the third attack and missed entirely with the fourth. The fifth and final attack netted a momentous Push/Dodge and a point of damage. I disengaged from Velocity, promptly forgot to play my Heroic Landing Plot Card for an effectively free Unnatural Stamina, spent MP like a chump, and repositioned myself next to a wall on my half of the board. Not for the first time I was left wishing Scalpel had a double-Dodge somewhere on her playbook.

Velocity was well in range to have a go at ball retrieval, using Acrobatic to get the necessary range for a charge. I Defensive Stanced the charge and Chris managed to cheerfully fluff his dice rolls so as to leave me with the ball. Cheers, bro.

Mother put down a Spider Nest next to Scalpel. The rest of the turn was Casket sprinting to lay down Ghostly Visage templates, Ghast hiding in one, players spreading out, and a couple of Blast Earth template coming down on Casket and Graves from Ratchet and Moist respectively.

Moist.


0-0.


******


2. I won the initiative roll and loaded up Scalpel. Referencing the rulebook I confirmed Chris's claim that you cannot end any movement on a marker (in this case the Spider Nest) which put paid to my plan to Dodge out of engagement from Velocity, sprint/charge Colossus, and score a goal. Bugger. Instead I punched Velocity around for Dodges (literally all I could achieve), disengaged and sprinted before using Unnatural Stamina to position Scalpel almost in the very corner of the board in Chris's deployment zone. Much measuring required to account for Alternator increasing the threat ranges of both Velocity or Colossus! This removed the ball from the game (and unfortunately Scalpel herself!) next turn, pushing us towards a punching game instead.

Moist laid down a Blast Earth hitting both Ghast and Graves, triggering Rising Anger but also forcing me to spend MP for Gliding if I wanted to have them contribute to the ensuing scrum. Ghast charged in, knocking down Ratchet and pushing him towards Colossus (blocking his charge into Ghast) with a follow-up attack. Colossus walked around Ratchet, knocked down Ghast and blew through Fear. Graves, like a complete idiot, decided it would be safer to stand next to the imminent nuclear explosion that was about to take place, charging Colossus and knocking him down.

Ratchet shook Knock Down, used Fixer to stand Colossus up for free, engaged Ghast, Tooled Up Pin Vice and also used his Heroic Play Overclocked to give her a free charge. Eep!

Casket wandered over to put Velocity in the Foul Odour bubble. She laughed (hard), used Acrobatic to jump out of his aura, and charged Ghast, Push/Dodging him out of engagement with Pin Vice (and therefore allowing her to take her free charge) and taking a measly 1 damage from Ghast's hasty counter-attack. Pin Vice activated and started by putting Deletion on herself. Having now fully formed Voltron, Ghast was officially "in trouble".


She charged in (free), knocking Ghast down and dealing some horrendous damage. Over the course of the next 4 attacks Ghast was quite easily wiped from the face of the table ("double Tooled Up" legit!). Standing all too close and fully regretting his life choice, Graves realised he was going to be next!


2-0, Engineers.


******


3. Engineers unsurprisingly won the initiative and Colossus moved in, looking to replicate the machine-like efficiency of the previous turn. This time is was Graves' turn for some loving attention and he took a Knock Down from the big man. I spent my free point of momentum to stand Graves up and he had a bash at Ratchet who was engaging him, managing a momentous Push result. Then he swung at Colossus. I needed all 5 dice to connect to force a Knock Down so Chris declared a counter-attack. Undaunted, Graves was successful with a non-momentous Knock Down/Blood. He spent his last point of influence to run the hell away but despite not being engaged by any Engineer players it very much looked like the writing was on the wall. Indeed, forced along a little by the intimidating presence of a fully loaded Casket, Pin Vice activated next. Forgoing the pitiful Tooled Up of Ratchet she put Deletion on herself charged up to Graves, and royally cleaned his clock easily getting a second Take Out. With that side of the field starting to calm down, Minx charged into the knocked down Colossus, snaring him, getting a nice Dodge into Velocity, snaring her too and fading away with Back to the Shadows.

After some thinking, instead of opting to use Mother's Spider Nest to deny a landing space for Casket getting in onto Velocity, Ratchet manned up and stood in the way instead. He used Fixer to clear snared off Velocity (curses!) and punched Vileswarm who at this point was also engaged by Velocity (standard middle of the table mess!). Casket came in hard on Ratchet with a Knock Down and some follow-up damage but his final attack was a disaster, failing to get my the momentous Heavy Burden that I hope to tag Velocity with. Gag. Mother put down another nest and lurked nearby with sinister efficiency, engaging Casket. Ghast wandered up, having returned frighteningly close to the action but unable to contribute just yet and Moist meandered over using True Replication to borrow Tooled Up from Ratchet, putting it on Velocity.

Sensing imminent death, Vileswarm activated and repositioned to get within 2" of Colossus. Velocity went next and punched old ratty to death. I don't think Chris had fully read Vileswarm's card...


Vileswarm went up with an enormous ***BANG!*** hitting Colossus, Casket, Ratchet and Velocity. He was a whisker out from catching Hoist and Minx too! A brief chat on the wording of the card caused us to decide that models with Tough Hide would take full damage from Noxious Death (as Tough Hide specifies enemy Plays or playbook damage and Noxious Death is neither). Glorious. A rather embarrassed Velocity wandered away from Casket in a daze to stand behind Colossus.

Last activation of the turn was Scalpel still sitting way off in the distance on 2 influence. She ran into scoring range of the goal (just outside of Tap In range because I'm such a champ), Bonus Timed her shot and scored. The scatter was amazing, sailing just over the knocked down Colossus to land right in Velocity's lap. Scalpel Dodged from the successful goal getting into sprint range of Colossus.


5-4.


******


4. I managed to take the initiative roll and set about the well-deserved demise of Colossus who took 5 condition damage from poison and bleed (to be fair, a lot of players to poison damage this turn. Cheers, Vileswarm).

Scalpel spent 6 influence removing the snared/knocked down/poisoned Engineers big guy, finishing her activation by engaging Ratchet.

Velocity really had to go next. She came into Minx, deftly avoiding a counter-attack, put up Nimble and easily put one into the back of the net. I played the Who Are Ya? Plot Card which was quite satisfying as it would handily negate the effects of Nimble if triggered by the right player. She Dodged from the goal (which was a Screamer!) to engage Minx and deny the free charge. The ball went out wide and loose near a newly returned Graves (Vileswarm came back on too - sat in my corner for the rest of the game trying to stay the heck away from everyone else). Casket had to go next and spent down all my momentum on Bonus Timing his attacks into the knocked down Ratchet, popping his Legendary before the last attack and managing to Casket Time him just as planned. Marvellous.


Such a pity that you can't Casket Time the ball!


Surely one of the plays of the game now. Moist moved up towards Mother, borrowed Burrow, and popped out to engage Minx! He pulled her away from Velocity and in her activation she spent her only influence in a futile attempt to disengage. Sadness - I got two hits with my one attack. Got the momentum and a Dodge but Tough Hide denied the damage and therefore also denied Back to the Shadows. Classy play from the Engineers there.

Mother went next and I had that sinking feeling when I realised I should have activated Graves first to snap the loose ball. She put down a Spider Nest and used Webbing to capture the ball, unsnapping it so that Pin Vice would surely sprint over and pick it up and Velocity was nicely unengaged ready for the Snap Shot! Disaster! Ghast time! Sitting on one influence and seemingly out of range to do any real work I played my last Plot Card, the awesome Wing Back. And Ghast didn't disappoint this time, his charge into Pin Vice getting the crucial momentous Knock Down. Suddenly Chris's plans were up in smoke!

Pin Vice shook and advanced away from the ball, tagging a forest. She spent her influence punching through Fear but being careful not to do any actual damage to Ghast so that Chris could build some momentum. Graves and Vileswarm durdled and we ended the turn with Chris ahead on momentum by one.


10-9, Morticians. Close game is close!


******


5. Absolutely massive roll and I nailed it, handily stealing initiative for the turn. Chris was ready to throw in the towel but he'd forgotten a major change for Season Three. Scalpel loaded up, sprinted to grab the ball and base Mother and started punching. She Push/Dodged him away from Pin Vice and eventually got the Take Out. Chris went to shake hands... Bro, Mascots only give up 1VP. But Scalpel had the ball now so the Engineers would need two Take Outs to win the game! Unnatural Stamina put her in melee with Colossus (on reflection a BIG mistake on my part). Removing Mother also removed the three influence she was carrying from the game and we started the momentum race for next turn, which ended with Velocity on 3HP, snared, poisoned and engaged by Casket, Ghast closing in, Moist continuing to be a total pain in the arse, and Pin Vice continually stymied by Ghast's Knock Down.


11-9, Morticians.


******


6. Long game. Minx's time to shine - freed up from her work last turn (and having used the Vengeance token to inflict maximum pain after getting the full book with an earlier charge) she crashed into Velocity and blasted through Reanimate. The dice were kind and with her second bought attack, Velocity's last hit point was removed and Morticians clinched the game!


12-9, Morticians win!


******


What a massive game. It was so great to be able to play yet another new team and this was a totally different experience. I feel I was really up against it when you consider:

- 3/6 Engineers had Reanimate (and two of those players are also DEF5+)
- 2/6 Engineers had Tough Hide
- 3/6 Engineers also had Close Control!

And seriously why the hell does Hoist have Sturdy?! It's mental!


It was so cool to see Pin Vice wreck both Ghast and Graves in short order - she's awesome. I had grind away at Velocity all game for the eventual Take Out and the win - she's nails! Ratchet was always contributing either with his Character Traits directly or by allowing Hoist to borrow them.

True Replication is incredible!


Pretty much everything on Colossus's card had an impact. He used Long Legs to nab the ball top of Turn One. He resisted a Push from Graves with Stoic. Momentous Knock Down or Knock Down/Push was order of the day. His other abilities only add to the hype - Unexpected Arrival and Singled Out (both of which can of course be used by Hoist! Hoist! Moist!)


I was happy with all of the Morticians barring two. Graves2 and Vileswarm.


Graves2. Hmm... Ok he put a Knock Down and bleed into Colossus which definitely helped Scalpel take him out. Why am I struggling to like him? His death at the hands of Pin Vice was definitely more my fault than his. Chris had some fire dice that seriously dented the worth of having two points of armour. I can't figure out why I'm not feeling him.

Vileswarm. Ugh. Ok, maybe not the best team to drop him into (half the Engineers team this time not being targets for potential Vindictive charges). He died in an excellent position to cause reasonable carnage by I can't help feel that wasn't so much my brilliance as it was opponent error. 4/0 and 7 boxes is miserable. I guess I could have kept him off the table instead of returning, run Graves to a better position when he came back on, and used Graves' Creation to bring Vileswarm back helping to Crowd Out Velocity or Hoist. I wish his damage buff from Graves was passive instead of an Heroic Play - spending 1MP to get +1 damage and still have the 4" tie-in is situational at the very best. I'll keep mucking around with him on and off.

Maybe both Graves2 and Vileswarm would be better in an Obulus team?

Kicking off again I declined the option to take Bonesaw so he's still standing in the wings and waiting patiently for his time to shine (or his time to go back on the shelf for the entire season).


Cheers,
Dave


Sunday, January 8, 2017

The state of play

The Egg Cup


A last minute dropout saw me free to join a 16 man GB tourney in Manchester this weekend, the "Egg cup". 

Get it?

GET IT?!


I was pretty certain that I was going to get noob-stomped, having only played a handful of games in Season 3 and (to paraphrase Will Wijnveld) not being blessed with the ability to win. But nevertheless I packed up my trusty Morticians and headed into the lion's den.

Looking at the field there was only one Butchers Guild (so much for my initial impression that Fillet was everywhere, this guy was running Ox only). A smattering of Masons, Fish and Engineers stood in contrast to a quarter of the field being Spooks. Ah.


My 9-man roster consisted of both Obulus and Scalpel with Dirge (screw Vileswarm, he's pointless), Graves1, Ghast, Cosset, Silence (no longer an auto-include I'm finding) and Casket (a total bluff). My one permitted Union model was Mist (Stent, stop yelling at the screen).

Round 1
Morticians vs Fishermen

 
First off was a game vs Shark. How broken would Fishermen be in Season 3 I thought? Happily the guy only had Season 1 models with him, so no Veteren Siren. Bliss. I felt cornered into taking Obulus due to the propensity of Fish to have 2" melee coming out of their arses. Hence I went with my usual Scalpel lineup but with Obulus instead: Dirge, Cosset, Graves1, Ghast and Mist. Plenty of 2" melee of my own there.

I won't attempt to go in depth for each game but we traded two goals apiece whilst Graves smashed Greyscales into the dirt. Momentous 2 damage on three hits plus Crucial artery and 2" melee means he can decapitate isolated targets over a couple of activations. Loading him up with four influence and letting him go to town makes me feel warm inside. Graves2 can suck it (please refer to my earlier remarks regarding Vileswarm).


This left us at 10-8 at the start of the turn with a straight dice roll for the initiative. High noon. Obulus and Shark stared each other down. First to activate and get to the ball would almost certainly score. Obby flinched for a fraction of a second and was left eating Shark's dust as he sped off to score effortlessly.

 
Final score: 12-10 to the Fishermen

Round 2
Morticians vs Butchers


I loathe Butchers. As I've said it initially felt like Fillet was everywhere in Season 2 and Season 3. I'm not entirely sure what can be done against a fast, hard hitting captain with a very useful AOE attack (so even if you get out of her threat range, you aren't out of her threat range). But hurrah! This guy is playing Ox. Bonus. Is it? What does Ox do? Well, he only has a 1" melee and no access to dodges, right? If I take Obulus over Scalpel then he'll find it hard if not impossible to get around Unpredictable Movement. Sorted.

Graves, my poor Graves. Having recovered the ball on turn one he found himself hit by "mark target" from Boiler. From there Ox, Meathook and Shank managed to get to him and a thin red smear remained where once the proud gravedigger stood. My own stupidity also allowed Ox to end the turn up on momentum and within 1" of Obulus. Unpredictable movement isn't useful if you forget it.

From there Ox popped his legendary play and causally removed Obulus, Cosset and soon thereafter Dirge from the pitch. I didn't like the colour that Ghast was turning either. It looked like he was haemorrhaging. Fortunately by this point I'd scored and taken out Ox in revenge. A freshly icey sponged Obulus returned to the fray in time to dispatch Shank and with superhuman effort puppet mastered Mist forward toward the goal whilst paralysing the Butchers team with the stiffness of death. Ghast bled out, leaving the score at 11-8 to the Butchers. Mist heroically ricocheted off Boar, sprinted at the goal and.....


....scored! I was just as surprised as anyone really. I mean it's not what he does, is it?

Final score: 12-11 to the Morticians. Thank goodness that mascots are only worth one VP now.


Round 3
Morticians vs Masons


Excellent. Another team that I haven't encountered yet in Season 3. I have however learnt my lesson from getting smashed by Hammer in Season 2 in that if Obulus plays carefully then he should be able to avoid Hammer's hammer. Oh, I guess that means I'm playing Obulus again. Oh well.

 
I kick off and a beautiful scatter means that his only turn one goal threat, Flint, has to retrieve the ball and pass to Mallet. He doesn't dodge away however, leaving Mallet within puppet master range to pass me the ball back. Surely this is a trap? Perhaps not. Sounds good. Mallet, the ball s'il vous plaît.


Bastard missed. Football legend my arse.

This denies Obulus the ability to get the ball and dodge to safety so Mallet got a few swings in. Cosset gets the ball back to Obulus and I take first activation next turn. Obulus surges on goal and promptly, obulusly, misses. Now he's properly screwed, surely.


From the above pic, I was terrified that Mallet and Flint could box Obulus in while Brick and Hammer go to town and destroy the Ferryman. Instead, the GB gods smiled on me and my opponent sent Hammer and Decimate after Graves, down there in the bottom right.


What do you do when Hammer zigs right? Zag left, hard. My entire team ran off from the Mason captain and his union consort, leaving his heavy hitters stranded on one side of the pitch. Too late I think my opponent realised that he was grossly of position and I collected the ball from the armadillo for a second goal to add to two takeouts. Thats a sentence I never thought I'd write.

Final score: 12-4 to the Morticians.

Round 4
Morticians vs Union

 
Veteran Rage. Veteran Rage. 1" melee, and he isn't really all about dodging either. Scalpel should be a safe bet. Yeah, Scalpel sounds good.

I panic and take Obulus.

This guy had Veteran Rage AND Harry the Hat. BOTH have Rising Anger (Ghasts ability to gain two momentum the first time that you damage them per turn). That is hilarious! Until you keep on bloody forgetting it. Then it's really not hilarious.

I kick off with Obulus. Can I pull the same trick and reel in the ball from Gutter? Why yes, I can. And successfully this time. Having passed the ball down the line I'm on my way to scoring with Mist until his (evil twin) Mist runs and stand directly in front of him. Boo-urns. Instead I dodge off, pass the ball back to Obulus and leave Obulus alone in the centre of the Union half of the pitch. Obulus promptly scored, and in response I think my opponent criminally underfuelled Mist, relying perhaps on bag of coffers for efficiency. Seemingly all too keen to spill blood, Rage charges into the midst of the Spooks taking the ball with him. Hacking left and right he leaves Graves (why is it always Graves?) fighting for his life. However he ain't dead yet and after Ghast smashes Rage into the floor Graves deftly scoops up the ball and with the last of his strength passes to Mist who dodges away from evil-timeline Mist and into a scoring position. All well and good unless Gutter has anything to say about it. 

 
Friends, I'm not sure I've ever seen anything like it. Between a charge and two further bought attacks, Gutter doesn't even manage to scratch the paintwork on Mist. Not a sausage. After that the bottom rather fell out of this guy's world and I pick up two further goals with Mist and Obulus. Graves and Cosset earn a visit to the nurses office but it's little comfort. 

Final score: 12-4 to the Morticians.


I was aiming for 2/2 so to go 3/1 was a pleasant surprise! To add to that I came 2nd overall, which was shiny. I picked up a voucher, patch, GB die and even an egg-cup. Nice touch.


So what's my view of the English meta? Well I think I'm happy to report that rather like Warmachine/Hordes (as opposed to Warhammer) the Guild Ball rules are tight enough that there aren't any "house rules" or cultural differences in how the game is played. Beyond that it's personal preferences and I will say that I've seen a lot of Engineers and Butchers, which is nice(ish). However some people were extolling the virtues of Casket to me and so are clearly stark raving mad. 

Until next time my little ravens. Stay spooky.

DTY Dave


Thursday, January 5, 2017

S3 Batrep 6 - Fresh Meat


Multiple Guild Ball games in one week = a very good week indeed! Taking advantage of the holidays I took the offer of a game from local/national (NZ isn't a big place) Pundit, JS. I think "JS" stands for Jean-Sebastien or something similarly European and super trendy sounding, but we always call him by his initials. Curious.

I cheekily but politely requested to please not be made to lose to Fishermen or Hunters (again) and JS kindly obliged by bringing Butchers and his fantastic, Batman villains paint-themed Union (Solomon Grundy Avarisse carrying Mad Hatter Greede is so full of win!). Asian Nick drops Union on the odd occasion so I asked for Butchers. Excellent. Being a Pundit sadly doesn't give you a free pass from the realities of life so not only was JS literally handed a pile of shit by one of his twin toddler-babies just before he left the house for our game, but he also hasn't actually played  a game of Guild Ball for over a month. So this was the perfect opportunity to smash him!

We played at The Shed. The Shed is like ghetto Dojo - beer instead of tea, garage (quite literally: a shed) instead of dining room table, and trash talk throw like daggers (both at others and also liberally self-inflicted) instead of scorched almonds. A very welcoming atmosphere though and a big thanks to Double D for opening up for the homeless and errant nerds gagging for tabletop action. Lovely people those Daves.


The Shed. Cosy.


Anyway, the game...

JS did his best to put together a terrible 9-man roster, running with: Ox, Truffles, Shank (fuck this guy), Meathook, Veteran Brisket, and Harry the Hat. This left Boar, Brisket1, and Tenderiser on the bench. Much of JS's game was spent bemoaning his selection of Harry over Boar. Not sure - Harry's counter-attacks and Rising Anger seemed pretty good but I can envisage the carnage unleashed by a Boar that you think is out of range until he's Quick Timed by Brisket!

Thrilled at the prospect of not facing Fillet (strongly convinced Scalpel is awful into her and I'm still not interested in playing with Obulus) I ran with: Scalpel, Dirge, Casket, Cosset, Silence, and Graves1. This left Obulus, Ghast, and Minx on then bench. Quietly proceeding with "Operation: Portugal", this time most significantly leaving Minx off the pitch. I took Casket over Ghast because it felt like he was just more durable and Butchers have to spend to get around Foul Odour (or as JS calls it, "cancer").

I won the roll off and the ball went to Brisket2 who kicked towards the flank but of course nowhere that Dirge couldn't retrieve.


******


1. Graves activated first, Tooled Up Cosset and retrieved the ball, passing successfully to Cosset who Dodged forwards and into charge range of Brisket. Harry countered by placing a Molotov blast in her charge path (nice).  Cosset had the movement to Dodge around the Molotov template into a big patch of rough ground and then still have the movement to charge Brisket, but she flubbed the pass to Silence and the ball went sideways well into range of Brisket. Bugger. What I should have done is Lure Brisket into the fire, walk away and drop the ball, snapping it to Silence. Bah. Cosset used her last point of influence to run to the left, taking cover next to a pile of rocks that would later become the swing point du jour for 90% of the game. Brisket declined staring a gift horse in the mouth and advanced up to collect the loose ball.

Truffles ran towards Cosset at full clip. Casket activated and advanced, Foul Odour almost extending to catch both Graves and Cosset (love that Foul Odour mini-game where you're constantly fighting screwing yourself with rough ground). He put a Ghostly Visage template onto Cosset which would hopefully save her from most of the attention Shank could maybe later apply. Meathook advanced in Brisket's general direction but far enough away from Harry that I wouldn't be able to set both of them on fire with Silence's Fire Blast. Dirge advanced to engage Brisket and at this point I decided it would be a good idea to read Brisket's card. Ah... Unpredictable Movement - that's going to be a problem. Good thing I hadn't charged her with Cosset then! With Silence nearby on 2 influence Brisket decided not to Dodge away allowing Dirge to land a momentous (and probably mostly pointless) Singled Out. Ox advanced to the centre of the board, well in charge range of Graves next turn. Oh dear.


GG, Graves. GG.


Desperate for momentum but sadly only carrying 4 influence, Scalpel ran into the Ghostly Visage bubble and popped Voodoo Strings to drag in the piggy. I dialled up some damage and JS informed me that Truffles has Tough Hide. Ah. I bought and was going to select the Knock Down result. JS informed me that Truffles also has Sturdy. Ah. Hmm... With reasonable rolls and a Push/Dodge, Scalpel eventually gained 3 momentum and took the pig down to 6 boxes.

Shank ummed and ahhed and eventually decided to just advance and throw a Thousand Cuts at Cosset, dealing the necessary one point of damage to make Damaged Target live for the following turn. Silence put a successful Fire Blast down on Meathook and advanced to cover the goal in a vain attempt to stop Brisket from scoring next turn.


0-0. Bloodshed imminent.


******


2. I won initiative and activated Cosset first. She went Crazy and punched the pig inflicting a mighty Screeching Banshee. I was practically licking my lips rolling TAC8 into DEF2/0 and Cosset did not disappoint, removing the filthy animal and netting me 4 momentum in the process (after healing). I was particularly pleased to be able to use the "Push/Dodge to disengage, Furious charge back in" trick.

This left Scalpel open to a charge from Ox however and in he came, triggering his own Legendary Play Get 'Em Lads! Lucky for me JS is so rusty because he neglected to use Tough Skin before coming in. Standing next to cover Scalpel managed to dodge most of the TAC11 charge and tickle him in return for a Push/Dodge, disengaging and feeling quite pleased with herself. I was far from having it all my own way however. Scalpel ran around Ox to punch Shank. She managed a meagre 2 hits, taking the momentous Dodge before Shank rolled like a champ for 5 damage and a double Dodge (Ox aura, Ox Legendary, and a fucking dice explosion). Not good. Sensing death and unable to punch with her remaining influence, Scalpel used both Wake the Dead and Second Wind to re-engage Shank after healing for 4 hit points. What a waste!


And/or wasted influence.


Harry advanced into Graves and momentous Pushed him into Ox's aura, ready for the Meathook carve up. In response Casket came in, flooding the middle of the board next to the big deal pile of rocks with rough ground and stuffing everything up for all concerned. He knocked down Harry non-momentously, bought an attack and put a momentous Heavy Burden onto Shank, and used his last influence to put down Ghostly Visage, properly hosing Meathook as well. The plays and counter-plays of this game are just amazing!!! I opted not to deal damage to Harry in order to avoid triggering Rising Anger.

Shank punched Scalpel around a bit, disengaging from her melee range but otherwise keeping her in his while trying to stay out of Foul Odour. Graves durdled next Harry. Brisket punched the bird for damage and Dodges, advanced but couldn't get Silence out of the ball path, and Bonus Timed a shot at goal on three dice. She missed! The ball scattered off the table! The ball scattered from the centre of the table and was taken by Ox after a contested snap with Cosset. JS took it all pretty well.


Dirge jogged to engage Brisket who used Unpredictable Movement to Dodge away. Meathook, looking a little worse for wear from fire damage wandered over to a nearby wall for some cover. Silence engaged Brisket.


1-0, Morticians.


******


3. I won initiative and set about widgeting for a fun but dicey play. Graves on 4 influence used his 3" of movement (cheers, Foul Odour) to manoeuvre around the knocked down Harry and into his melee range of both Harry and Meathook. Swinging into Harry after using Tooled Up on himself I needed to hit the 5th column on every attack to Take Out Meathook with Scything Blows. Unfortunately I missed with my second attack (dealing 3 momentous damage to Harry instead... still seems pretty good!). Meathook was left on 2 boxes, bleeding and on fire while Harry took a total of 11 damage and bleeding to accompany his knocked down condition.

Before I could consider healing her up, Shank wound his way through models, terrain, and Foul Odour to get stuck into Cosset, removing her easily and staying engaged with Scalpel. With his last Dodge resolved he failed to get within 8" of Meathook in order to heal her up for which I was very grateful!


Crossing my fingers that the setup was enough that even he couldn't screw it up, Casket ran around Harry to engage Meathook, used his Legendary Play and managed to remove her last two hit points to Casket Time her off the table! Hooray! Brisket punched Silence to disengage and lined herself up on the goal for a snapshot. Instead of attempting to re-engage her, Silence just moved to stand in front of the goal again.

Ox whaled on Scalpel for a bit before growing bored with adding to the huge amount of momentum JS had accumulated. He Bonus Time passed the ball to Brisket looking for a snapshot. And failed the pass! JS took it all pretty well. Again. The scatter was kind and the ball snapped to Brisket. Scalpel continue to touch up Ox with all the weight and import of a feather duster and I spent down my momentum as much as possible given that JS was so far ahead in the race. Rather than trigger Unpredictable Movement again, Dirge flew to engage Harry who had stood up, gone Crazy, and taken a swing at Graves.


5-2, Morticians.


******


4. JS won initiative with 11 momentum in the bank and after Cosset came on in a position to charge Harry (engaged by Dirge) took no time in deciding that the bird had to die, and quick! Shank had the honour the bird disappeared in short order. A shame really as I've love to see that charge go off at some point. I went with Cosset next anyway and she pursued her Furious charge into Harry. JS made an error here, not declaring a counter-attack against the charge. I took this opportunity to apply a momentous Screeching Banshee. He declared a counter-attack against the follow-up but it was too little, too late - Cosset hitting DEF2 wrapped to the second column and got the Take Out, healing herself before finishing her activation.

Ox looked like he had his work cut out for him trying to finally rid himself of Scalpel until JS rolled eight 4s with his last attack and she exploded in a shower of gore and regret. Frightening stuff. Silence continued to lurk but this time it was all for naught as Brisket slotted in the Bonus Timed goal putting the Butchers ahead 9-7.


Graves declared a charge into Ox. I proxied a base to avoid being engaged by Shank and Ox and asked JS if he wanted to declare a response. We talked over another advantage of 2" range melee - he couldn't confidently declare a counter-attack because I might not end up in his melee range. As it turned out I decided not to head to the proxy base, instead charging away from Shank. Ox did Defensive Stance however. Graves' attacks took him down to 11 boxes. The piggy advanced.

The goal kick after Brisket's success was very kind and I spied an opportunity for greatness for the hulking beast who surely would clinch MVP if he could make it happen. Widgets out and greatness all but confirmed, Casket sprinted to the Tap In line, collecting the ball on the way in. I Bonus Timed the shot and... Casket scores!! Unbelievable game for the big man! The goal kick went out with the intention of finding Ox but scattered into the middle of the table perfectly to not be claimed by anyone.


11-9, Morticians.


******


5. I won initiative (thank goodness!) and a newly returned Scalpel on 6 influence played the Wingback Plot Card to charge Ox for one influence, landing in base contact. She flubbed the charge roll tickling him for a measly 1 damage and the Push/Dodge. Fortunately for me JS's hot dice rolling on Scalpel deserted him and he only managed 2 damage in return. After knocking him down and with some Ganging Up help from the nearby Graves, Scalpel managed to comfortably finish him off with her last point of influence.


12-9, Morticians win!


******


What a game! It was so great to play against an unfamiliar team and there were some real shocks in the mix throughout:

- the stack of sweet rules on Truffles
- Unpredictable Movement on Brisket
- the real meaning of fear when you realise the power of The Owner and Get 'Em Lads!
- Shank being an enormous douche bag every time, all the time


Casket was easily player of the match.

- Casket Timed Meathook (who never got to make an attack all game)
- Scored a sweet goal!
- Pushed Foul Odour everywhere forcing frustrating movement decisions (for both sides!)
- Took zero damages

To be fair, Graves was a close runner-up. Took no damage, and set up both Meathook and Ox for their ultimate demise. Amazing work from him.

Scalpel's patchy game mostly seems to illustrate my continuing need to work on when to use her Legendary Play. I spent it to get the first activation in the next turn and the value is questionable. If she had 6 influence instead of 4 she still wouldn't have killed Truffles in Turn One. I really needed Voodoo Strings when Shank got his awesome double Dodge away in Turn Two and she was left looking like a real lame duck on 5 (practically) wasted influence. Awful.

Dirge did well, probably forcing his own demise at the right time. Silence was... iffy. The early Fire Blast made a real contribution over time the Meathook Take Out and his DEF5 was relevant against Brisket's attacks. He healed himself in the turn I was obviously not going to win the momentum race and finished the game on full health. The question for me is - would Minx have been better?

Cosset was very good. Take Outs on Truffles and Harry. She died easily in return - that's partly a measure of her flimsiness and partly an indication of how deadly Butchers can be in the Ox aura.


Cheers to JS for the game. Given that he's about 1/4 of the readership of this blog (me and my Mum making up another 1/2) it seems only right to convey my utmost appreciation for taking the evening out to become the subject of a battle report. I'm sure next time he'll just mercilessly drop Fishermans against me and make me hate life once again :)


******


Local retailing champions Mighty Ape have a one day tournament coming up soon and that will be my first tournament ever for Guild Ball. Excite!

Till the next time - may all your balls be gilded. (Just trying out sign off lines).


Cheers,
Dave


Tuesday, January 3, 2017

S3 Batrep 5 - Be Like Portugal!


Having chipped away at a standardised and consistent team build I'm attempting to move further away from the comfort zone. To this end I've reworked my 9-man roster as follows:

- Scalpel, Dirge, Cosset, Minx, Bonesaw, Casket, Ghast, Graves1, Graves2

This change most significantly removes Obulus from my game plan entirely which honestly seems fine because I just don't like him that much anyway. So, based on the dubious advice of Dr House it's time to jump on shakier ground and be more like Portugal (and destroy everything that works). Seems sensible.


To help me both celebrate and legitimise this fresh and creatively new approach to losing games, Chris returned from a busy holiday of buying pashminas and shoe horns in the dusky and refrigerated malls of Dubai to complete our three-game pre-season series of Morticians v Hunters. With the score standing at one game apiece we had all to play for (and yet simultaneously nothing to really care about). This time however he brought out the big guns and the real captain of the team. No, not Minx...

Teams selected with Morticians kicking off were:

- Scalpel, Dirge, Casket, Ghast, Minx, Graves2

- Theron, Fahad, Minx, Seenah, Chaska, Jaecar


Ghast was on kick off duty and managed a fantastic shot that landed just over the halfway line.


******


1. Jaecar retrieved the ball and successfully passed to Seenah, laying down a Pitfall trap to make Ghast's life more difficult. Dirge advanced. Seenah passed to Theron, botched it, and the pass scattered back to behind the lines. Casket advanced and pointlessly put down a Ghostly Visage. Minx retrieved the wayward ball and successfully passed to Theron. Graves sprinted up towards the halfway line.

Theron placed his forest to further stymie Ghast's possible advance and attacks into Jaecar, passed the ball to Chaska who used the momentum gained to Dodge forward. He then shot an Arrow to the Knee at Dirge. Minx charged towards Jaecar and triggered the Pitfall trap. Fahad was thrilled to find that I'm an idiot and Furious charged into the now Snared and Bleeding Minx, wrapping to the second column, applying a huge amount of damage (5) and double-Dodging away. Arse.

Ghast was just barely in range to sprint around the forest to engage Jaecar. Two punches Pushed him 4" into Theron's forest and into range of Scalpel's loving embrace. Chris went into the tank and came up with an amazing solution - Chaska sprinting, Bonus Timing a pass to the double-engaged Jaecar (success), using this to Dodge Jaecar back behind the forest again, and then putting both barrels into Casket. Bastard.

Scalpel sprinted right up to the forest (learned a new thing: you can't sprint over obstacles) and popped Voodoo Strings to pull Jaecar back in. A combination of the forest and shit dice got me three hits for the momentous Push/Dodge and a point of damage. Jaecar rolled like a champ and double-Dodged out of melee. Dick. I spent some time having a big cry and whinging about how broken the actual captain (Jaecar, obviously) of the Hunters is before spending 2 influence to Second Wind to engage him again. That might very well be the game right there.

0-0, plenty of action, most of it embarrassingly bad for my guys


******


2. Chris won initiative and loaded up Jaecar and other dudes. Jaecar obviously went first, skinned Minx alive for the Take Out, tickled Casket for more momentum and after Dodges and his advance, Tapped In an easy goal. The goal kick went over his head and landed near Graves but not close enough to snap.

Ghast charged into Seenah (hitting a Chaska trap) and between his charge and bought attack triggered two momentous Unmaskings dealing 6 damage to both Chaska and Theron, 4 damage to Seenah, and pushing the bear away to avoid a counter-attack declared against his second attack. Chaska was also Pushed into base contact with Casket and Theron was just Pushed away because I could. Ghast cleared his Snared condition.

The next few activations were Chris reapplying Snared and me trying to remove it. Theron removed Fear, pinged Rising Anger, and used an Arrow to the Knee to put Snared back on Ghast. Dirge advanced and removed Snared from Ghast again. Minx free-charged Ghast and put Snared on again. The bear hungrily eyed up Ghast and I had this sinking feeling that the fluff was about to play out in real life.

Meanwhile Graves put both Bleed and Gravedigger on Fahad. Chaska blew Dirge out of the sky and also shotgunned Casket in the face to be completely free from melee. Scalpel killed Fahad (Morticians on the scoreboard finally!) and sprinted in to attempt a second Take Out on Chaska but the dice weren't kind and he survived on three hit points.

Finally, the moment we were all waiting for...


Ghast was absolutely thrashed by Seenah and although the damage math was hard Chris eventually worked out the optimal way to get the Take Out, finishing him off with a mighty Bear Hug just like the story! Ah... it's so satisfying when art imitates life. Ghast's lifeless/throatless corpse hit the ground harder and faster than my hopes at getting back into this game.


10-2, Hunters (I hear 10 point turns are pretty good).


******


3. I win the roll for initiative and Graves does what he must - spends his 1 influence to run through fast ground and collect the ball, getting it as far away from Jaecar as possible. Theron walks up to Scalpel (still engaged by Chaska) and spends 4 influence kicking her ass applying Snared and knocking her down. She activates, stands up (no momentum to clear conditions) and bullies Chaska into a position where she can deal the Take Out blow, heal Casket, remove Snared on herself, and punch the Unnatural Stamina button repeatedly until her knuckles break. She only just manages to get out of the charge/sprint lines of both Jaecar and Seenah.

Minx charges into Casket and snares him. His counter-attack is pathetic (and his low playbook results are becoming more symptomatic of my frustration with him) and his follow-up activation is almost equally disappointing. Heavy Burden onto Jaecar and a sprint (sorry, "sprint"... effing Snared...) saves him for another turn. Various Hunters align themselves to inflict massive pain on Casket next turn and I eke out the game for more punishment and humiliation. Woot.


10-4, Hunters.


******


4. Chris wins initiative and the writing is on the wall. I hold my momentum because Casket's counter-attacks are clearly shit and also if he survives I might have a shot at goal with Graves who is still holding the ball and standing in fast ground. Predictably generous dice math denies me the opportunity and Casket is #getrektson in short order, momentously and fittingly Bear Hugged to death.

We both completely forget Reanimate on Casket and with that Take Out the Hunters win the game.


Aside from actually losing the game and getting damn near white-washed, there may be nothing quite as tragic as a fully loaded Captain watching her last team mate die, positioned in such a way that if he lives (because you know, you remembered Reanimate!) then she isn't even in range to accomplish anything with her 6 influence. FML.


12-4, Hunters win.


******


Post-game as is often the case when one loses and reflects solemnly on the complete imbalance of the game, Steam Forged's total inability to write solid rules, the wrong number of sugars you got in your cup of tea, the terrible humidity of an Auckland summer, and whatever else requires you to throw the blame at anything other than your own bungling ineptitude... I rapidly fired through a range of emotions, as understood and experienced by all coaches...


The game snowballed VERY quickly from the top of turn two and it took a small amount of honest discussion to figure out exactly where we went wrong this time. Many questions were asked.

- not Knocking Down Jaecar with Ghast's first attack in turn one?
- not Dodging Scalpel into the forest so kindly provided by Theron on the Push/Dodge result, thereby reducing Jaecar's dice on the counter-attack to 3 after cover and the Crowded Out penalties had been calculated?
- stupid Jaecar double-Dodging out away with his counter-attack?
- triggering Jaecar's trap with Minx (good) but putting her in a position to then be charged by Fahad (bad... so very, very bad)?
- Chaska's baller pass needing 6s to Dodge Jaecar back behind the forest?
- my horrendous positioning of pretty much every player for pretty much the entire game?
- Chris's vastly superior and consistently focused position of his players for pretty much the entire game?


Clearly there are winning strategies and protocols that must be followed and Portugal has of course already provided in abundance with this handy flow chart.


Tacking the ball off Jaecar in Scalpel's turn one activation might just have made all the difference. Instead I blindly went for damage and a misused Push/Dodge. For shame!

Pro-tip - get the ball to Ronaldo.


******


I'm wondering about Casket and Graves2. In theory Veteran Graves achieved what it says on the box - setting up the Gravedigger kill of a Mascot for Scalpel. Problem is that in the 9-man roster I currently have he only has one side to his card. I feel like I should be taking Vileswarm... but the ratties are hot trash held together by vomit and self-loathing. And taking Graves2 instead of Graves1 means missing out on sweet, sweet Tooled Up. Hmm...

Casket is also problematic. His unfortunate demise almost entirely falls on my shoulders as a result of callous misplays and poorly conceived choices but it highlighted a lack of contribution to the overall synergy of the team. I really want players who will do more work actively to set up kills for Scalpel and or bring better ball-handling to the team. Casket's only real positive in this game was dying only slightly less quickly than Ghast. Ugh... I mentioned my issues with his playbook earlier and it comes down to this - no Pushes or Dodges on the first three results. Counter-attacks with Casket are a bit rubbish, aren't they? Also, probs remember Reanimate #shamemyfamily #nationalembarrassment

It brings me back quickly to Cosset. What I really wanted in this game was Lure. So desperate to pull Jaecar out of his bunker and walking him 7" with Light Footed would certainly have done the trick! In fact I actually would have walked him 5" after forcing his trap to be triggered on himself as he becomes my friendly model. Geez that would have been awesome! This to me is what justifies Cosset's place on the Scalpel team.

And Silence... I'm still struggling to find a place for him. He would most certainly take the place of Graves2 in the main roster (which still gives Bonesaw a shot at glory or ultimate failure) but when would I put him on the field? At that stage it looks like the Graves2/Silence slot should be taken by Obulus again who I'll probably not be playing in the foreseeable future as I'm so enamoured with Scalpel!


- Scalpel, Obulus, Dirge, Graves1, Cosset, Ghast, Minx, Silence, Bonesaw


Super unsure about this line up now.